deep blue sea baby quilt tutorial
I am excited to share this tutorial with you today. This quilt is pretty quick to put together and is a great introduction to curves since these are pretty easy. You can read more about the quilt in my original post here.
If you have any questions or if you make your own, I would love to hear from you!
Cutting Instructions
When cutting your shapes it is faster to leave your fabric folded in half.
Kona Navy -
- Cut 1 strip 4.25" x WOF. Subcut into (4) 4.25" x 10".
- Cut 1 strip 7.5" x 40"
Kona Celestial, Cyan, Capri, and Aqua -
- Cut 1 strip 6.25" x WOF. Subcut into (4) 4.25" x 10".
- Cut 1 strip 4.25" x WOF. Subcut into (4) 6.25" x 10".
- Cut 1 strip 6.25" x WOF. Subcut into (4) 6.25" x 10".
- Cut 1 strip 3.5" x 40".
Once you have your templates cut, place them onto your fabric. The "A" template goes with the 6.25" x 10" pieces and the "B" template goes with the 4.25" x 10" pieces. If you left your fabric folded in half you can leave the pieces together to cut 2 templates at a time.
Since 3 sides of your template are already cut, all you need to do is cut the curve. You can either use a marking tool (I like Frixion pens) and then cut the curve with scissors or you can cut very carefully with your rotary cutter.
Piecing the curve
There is definitely more than one way to piece curves. I like to use pins so that is the method that I am going to demonstrate.You are going to piece 20 total curves. Sew the "B" Navy pieces with the "A" Celestial pieces, the "B" Celestial pieces with the "A" Cyan pieces, and so on.
Fold the pieces in half and pinch it to crease on both the A and B pieces.
They should look like this.

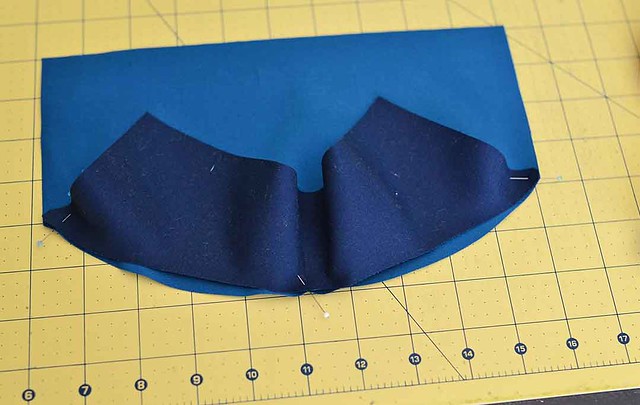
Line up the creased marks on the A and B pieces and pin.

And then piece at each end of the curve.
Now this part is a little tedious, but it doesn't take that long and it makes sewing the curve go pretty quickly. You want to use enough pins to make the edges of the A and B pieces line up all the way along the curve. Be careful not to stretch the fabric as you pin.
It should look like this.
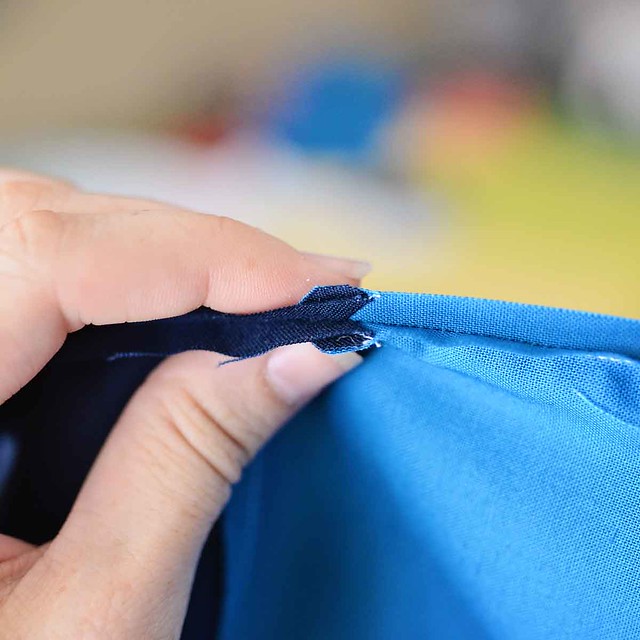
When you piece the curve just go slowly and remove the pins as you go. You might want to lift up your presser foot occasionally to adjust the fabric.
Once your you have pieced the curve, it should look like this.
Very carefully press the seam toward the darker fabric
And you have just pieced a curve! Pat yourself on the back.
Once you have all of your curves pieced you are going to sew them together into rows. Since your fabric may have gotten a tiny bit wonky when you sewed your curves, match the curved seam first and pin. Then if the top or bottom of the blocks didn't quite match up it will be less noticeable.
When I sewed together the rows I pressed my seams open but you can do whatever you prefer.
Once you have sewn your rows you can sew the rows together. Sew the 3.5" Sky strip to the top of the quilt and the 7.5" Navy strip to the bottom. Your strips are a little wider than the quilt, but this way you can trim the edges to make them nice and straight.
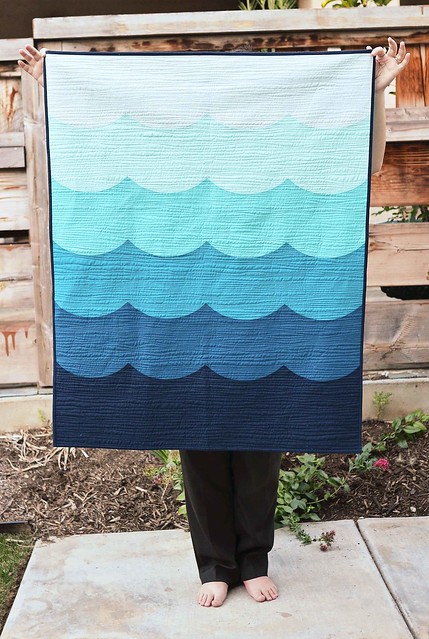
Baste, quilt, and bind as desired.
Finished size: 38" x 48"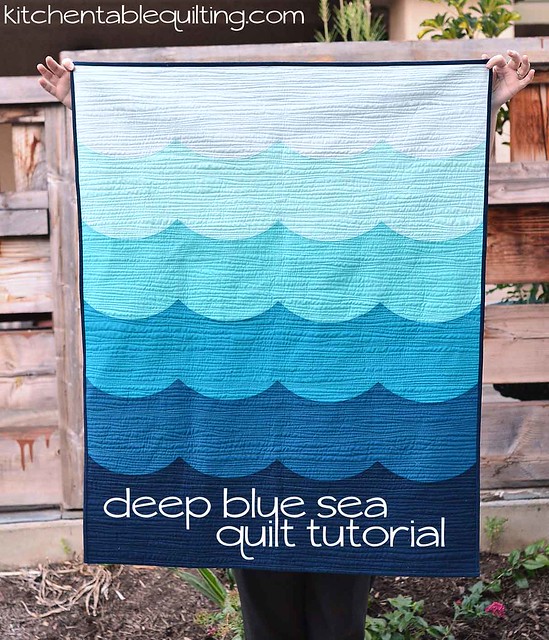





This quilt is fantastic! Thanks so much for the tutorial!
ReplyDeleteThanks I can't wait to have a go at curved piecing with so a beautiful project.
ReplyDeleteEeeek,I'm so glad you posted this! I couldn't get this quilt out of my head! I'm thinking of making it for a little boy I know...once I get the chance :) I'll let you know when it's done!!
ReplyDeleteThank you so much for making this tutorial. I have just loved your quilt since I first saw it. Thank you!
ReplyDeleteJanie
Awesome!!! Thank you!!!
ReplyDeleteAwesome... such big impact for a simple quilt. Love it; thanks for sharing the details!
ReplyDeleteThanks so much for the tutorial! You make curves look totally doable, and I love the finished quilt!
ReplyDeleteWhat a lovely quilt. Thank you for taking the time to make us all a tutorial !
ReplyDeleteThank you for the tutorial. I love it and want to be able to make it soon. Thank you again for your wonderful tutorials.
ReplyDeleteWhat a lovely baby quilt! Thank you for the tutorial! We will make one of these for a charity baby quilt for our guild here in NYC.
ReplyDeleteFabulous - love this!
ReplyDeleteLove this!! I'm unable to download the template. Could you email it to me please? Thank you
ReplyDeleteWhat a fun quilt! Thank you for the tutorial!
ReplyDeleteWhat a great quilt! Thanks for the tutorial.
ReplyDeleteThank you for sharing the tutorial for it too!! Yay! =)
ReplyDeleteThank you for the wonderful tutorial! Quick question: What thread did you use to quilt it? Variegated, light blue, dark dark, white... love what you did.
ReplyDeleteOops *dark blue not dark dark!
ReplyDeleteYour quilt is so cute, I made one in rainbow over the last few days.
ReplyDeleteThanks for the tutorial, that was really great. Thanks for sharing, check out White + Warren for more baby blanket. Thanks ! :)
ReplyDeleteLove, love, love this quilt! I wrote a blog post on Quilting Focus, a quilting directory site about summery quilts and featured a link back here to your wonderful tutorial. Thanks so much for sharing.
ReplyDeleteSummer Quilt Patterns
Is the thread on the top stitching all one color? If so, which color? Thanks!
ReplyDelete